Leaderboard
-
[[Template core/front/popular/memberRow is throwing an error. This theme may be out of date. Run the support tool in the AdminCP to restore the default theme.]]
[[Template core/front/popular/memberRow is throwing an error. This theme may be out of date. Run the support tool in the AdminCP to restore the default theme.]]
[[Template core/front/popular/memberRow is throwing an error. This theme may be out of date. Run the support tool in the AdminCP to restore the default theme.]]
[[Template core/front/popular/memberRow is throwing an error. This theme may be out of date. Run the support tool in the AdminCP to restore the default theme.]]
Popular Content
Showing content with the highest reputation on 01/03/21 in Posts
-
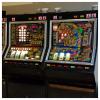
Hi guys its been a while since i have posted over here at MPU mecca .... its been a funny old year ... with C19 and loss of Wizard, some serious bad shit this year just to cap it off for me, i ended up testing positive 3 weeks ago, although im now on a full recovery it was not enjoyable, But on a positive side im hoping this will prevent me getting it again if my antibodies can break through the red wine in my bloodstream So firstly i would like to wish everyone a happy new year ( its got to be better than the last pile of poo ) anyway the reason for posting here was i was over at another forum that deals with vintage mechanical slot machines and some one posted a link to the George Wilson Arcade photo collection, i have never seen this before and found it fantastic ... so thought i would share it with you guys, if you have already seen it great, if you have not ... then you will love it here is a taster photo here is the Link to the collection https://www.seasphotography.org.uk/georgewilson Enjoy ... all the best ... Dicky3 points
-
I'd give the board a good clean too! If there's any deposits from the old RIFA's stuck to the board make sure you remove them as they can be conductive.3 points
-
I have some of the pins Nick, just the tool to crimp them is the issue, if Bob could come up with what tool it, that would be amazing, as I have a psu I need to re pin, as the wires actually burned off! 😂😂2 points
-
proper arcade, where people young and old and religious (the nun playing bingo lol) and the dog enjoying them selves, where amusement meant amusement not robbing thieving bandits not a dond or partytime in site ooh times have changed2 points
-
Unless the insulation on the wiring is actually cracking or showing signs of severe deterioration then I'd leave it alone. I'd replace the RIFAs and anything else that is out of tolerance, test it wit a meter then stick it in a machine to make sure it works as it should.2 points
-
Here is Good Fortune by Project, this is set on £5 and 5p play. From what I have read this was only ever released on this stake. Thanks go to: The rom provider Hitthesix for playtesting and help Loo for the manual Wizard for his amazing emulator, R.I.P Chris never to be forgotten. Shortcuts are in the notes Please use MFME 20.1 Hope you enjoy. Good Fortune Release.zip1 point
-
theres been a few threads recently showing various mps machines being restored so did nt want to tread on other peoples restoration threads . hopefully you can stomach just one more mps machine being restored and it makes a change to see a clubber being done albeit a rare one ! i know club machines are not everyones cup of tea and i tend to swing towards awps but i had to grab this one when i saw it at northampton last year . it s quite a unusual /rare machine as it s what i believe to be a sys80 /mps crossover and the date on the glass is 1984 when jpm were still making sys 80s like tumble & top streak . the whole look of this machine is great and looking at the artwork you would say sys 80 at a glance ,it even has the "select a gamble " feature the same as tumble . ive done a " just got this" thread with a vid when i first got the machine last year and you can see it plays like reel crazy but definatley predates that machine .another oddity is the fact jpm installed a hopper rather than payslides ( except for the 10p slide ) they did nt carry this onto other machines afterwards and im not sure why but if anyone knows why then id be interested to know . any way onward with this thread and i will as usual put a write up against some of the pics. so to start off with here are some pics of the machine in the condition i picked it up in . general view of machine two views of the glass artwork which was in excellent condition thankfully the next three views show the fruit symbols and the values as can be seen jpm used apples and lemons in their early club machines which did nt last long but i like seeing them along with the familiar looking jpm fruits as mentioned this machine has the identical select odds feature as tumble this really says it all , hardly any paint left on the button panel so definatley one for the powder coaters ! notice the two chunks of vinyl chipboard missing under the button panel there were three main ares of cabinet damage and the bottom right side of the kick plate had been err well kicked i think ! as will be seen later ive repaired this edging . the third area of major wood damage was to the back door and the top quarter had been replaced with a bolted over peice of ply board painted black but looking truly awful more pics to follow1 point
-
Crystal - Club Caesars Palace Tech: Impact Hail Caesar!!. Yep, its another clubber from me, one that's been done before but I thought I'd create my version for MFME V19.8+ Keyboard shortcuts in the notes section of the emulator. Thanks to Wizard for the emulator HTS for his classic (which I used for the hard to read bits in the picture). The rom and image provider. Please use MFME V19.8 or later to play Club Caesars Palace.zip1 point
-
No worries Joe, I will get on it tomorrow!1 point
-
Hi Mike Thank you for response much appreciated If you dont mind sending me a photo that would be grate and very much appreciated 👐👍👐1 point
-
Yes great pictures nick so many memories for me these pictures takes you back looking at them I must of looked at them about 50times haha 😜😜1 point
-
Thank you very much for this. It really does look fabulous.1 point
-
It annoys me sometime s that some folk forget how good these arcades were1 point
-
I think by pass method works really well but don't solder the wires together. Use male/female insulated terminal s to join the wires .it means when or if you have to remove the board for any reason you just undo the two wires from each other .the pins in the plugs are available but the extraction tool required is a bit more tricky to find .bob might be able to suggest where to get the tool and pins if you wanted to re pin the burnt socket .personally I'd sooner go down this path for tidiness.1 point
-
Evening Joe, yes you cur the two wires white and blue and take an Earth feed from the board, and join them together. This works and stops the problem with the burning, I have a couple of machines running this way, and they are solid, no resetting and shorting as I was experiencing before! The ideal would be to have new connectors for the plug, but it is hassle! I can photo one of the connections that have been added to one of my boards if that helps? Cheers Mike1 point
-
Might be a clickety click Joe1 point
-
Cheers dicky and brilliant pics .love seeing these proper arcades such memories. Stay covid free1 point
-
Nope, you can search straight off of Google and find it.1 point
-
If it was trying to pay out more than what was in the hopper, then that would cause the machine to go in to a tizzy. You could try this: Open up the back, put in a refill key and add some coins to it, (REFILL 1PNDX 0)[Press start] then close it back up again, or if you have 350 coins handy, you could fill up the hopper (HOPPER LEVEL)[press start] and then press the top up button inside somewhere.1 point
-
Think the areas that need accessing are for donators only.1 point
-
in keeping with the George Wilson collection there is also this interesting article by Alan Meades it called of showman and seasides it also includes some of the photos https://romchip.org/index.php/romchip-journal/article/view/60 all the best ... Dicky1 point
-
Today placed my new front with euro insert1 point
-
Ive had this a few weeks now. I thought i had posted this but i must of forgotten somehow. It was a random Facebook group buy. But was pleased to get hold of it 🙂1 point
-
Yes it is always those 2 wires that burn up, they not only carry the return current from 12v board power, but also return current from the reels AND all the lamps, coin mech as well, so they are under a lot of current passing all the time which results in increased resistance between the plug and socket which causes it to first get warm then with time passing they get hot then they burn up!! And that’s what happens!!!1 point
-
right this little beauty is finally finished more or less ! i thought rather than do more pics id do a short video of the external and internal apperance of the cab . apart from the newly constructed back door i also had to make a new inner cash box door and new hinge which is why i i show it on the clip . sorry about the amateur nature of the vid but at least you can compare it to the first set of pics posted on this thread . ive done a video which will follow later .1 point
-
ok fellas got a few minutes to myself today so here are some more photo s of the supafruit restoration . i have got to the stage where im putting back item s or reassembling stuff . i will try and keep the pics updated after todays pics the bottom right curved edge by the kick board was in a very bad way so this was replaced by a new section made up the old section cut off and removed new corner made up out of same wood colour/pattern and fitted using glue dowels and screw s . its as strong as it s going to be and should withstand a few knocks and bangs . and how it looks cleaned up and with wood dye added also mention in previous pics was the section of wood that sits between the button panel and cash tray . this too was removed and a new section cut from the back dorr was made up newly cut section instead of trying dowel this piece back in (which would have been nearly impossible ) two aluminium brackets were made and screwed into the wood . new peice in and fitted front and showing the brckets from the inside next to go back in was the cash tray . here it is after being powder coated . a quick before pic and fitted back onto the machine . just as tight to refit as it was to get out ! next pics will be the back door showing the fitments .1 point
-
final lot of strip down pics the next three pics show the removal of the cash tray . this proved to be a lot harder than it looked as it could only come out from the back due to the shape of it and the front board above it . it was very tight indeeed and had to remove the triac board and remove also a lot of wiring so not to damage anything . cash tray removed ! showing the strange shape of it ! the cashtray as you would usually see it ! again this went off tto the powdercoaters . cab minus the cashtray finally i have a stripped down empty cab to work on . i did have a few problem s trying to disassemble the alloy frames but got there in the end . the next few pics show the make up of these frames and they are of a sys 80 type useed in the later syle of sys80 machines . the corner peices are of a different metal to the frames . they could be a bronze mix of alloys but not sure . they have been polished up along with the frames . showing the cross section of thses frames and how the bolt slides in the channel this is how i finally managed to persuade the frames to come apart by using a thin wall paper scraper ! all frames disassembled . just a taster of things to come . i decided to get a new door made up after a lot of head scratching . its made of mdf and has a black slight gloss leatherette effect . i had the basic door cut to size but routed all the neccesary holes out myself which took an afternoon . just showing what is possible really .1 point
-
more strip down photo s . the display board was removed for safe keeping whilst the glass was removed all bulb holders taken off the top glass as breifly mentioned the board under the lower button panel had two chunks of wood missing and so the whole section of board had to be removed for replacement . this show s how unsightly it was . top glass and frames removed and of coarse the bottom too ! the plastic coin support plate that srews to the frame and ms111 coin mech also had a small coin hopper attached and it was easier to remove both together the plastic coin reject tube had a small bracket that had snapped . a new bracket will be made to secure the tube once it s refitted buttons removed and button plate removed as mentioned this machine had a hopper fitted . the connector plug that the hopper slides into was attached to a metal base plate . this was carefully removed so the base plate could be powder coated . the 10p coin slide area looking less clustered . again there is a base plate that the slide sits on and this was removed for powder coating too . i will do a before and after pic on another set of pics . one more lot of pics before i call it a night .!1 point